Managing multiple access zones at your event
Organizing a venue often involves directing distinct groups of people into general admission, backstage environments, and restricted hospitality areas. Keeping these groups separated relies on your staff quickly recognizing who belongs in each space. Without a clear visual identification strategy, your security personnel spend too much time checking individual credentials, which causes frustrating delays for guests. A well-planned event wristband system solves this operational challenge by providing immediate visual confirmation of access rights.
Designing this system requires you to look beyond simply ordering wristbands and instead focus on practical workflows. You must consider how guests arrive, where they need to go, and how your team will enforce the rules at various entry points. A cohesive approach combines different physical features to build a reliable access control tool. When your team understands how to read these visual cues, they can manage crowds confidently and keep restricted areas secure.
Mapping out your specific event zones
Defining all open and restricted areas at your venue is the foundational step before designing your wristbands. You need to map the physical guest and staff flows to understand exactly how many access levels your operation requires. Taking the time to categorize these zones clearly ensures you choose the right visual identifiers for each specific group.
General admission and public areas
The largest portion of your attendees will likely remain in general admission and public spaces. These guests need a simple event wristband that proves they hold a valid ticket to enter the main venue grounds. Since this group poses the lowest security risk, your primary goal is checking them in quickly and ensuring they cannot transfer their wristband to someone outside the gates. Mapping these main flow areas helps you determine the highest volume of wristbands you need to procure.
Backstage and production spaces
Production spaces require strict control because they house expensive equipment and facilitate the smooth running of your event. Only specific crew members, performers, and technical staff should possess access to these sensitive backstage zones. Because the security risk is much higher here, you must map out exactly where these boundaries begin and who stands guard at the entrances. Identifying these critical checkpoints dictates the need for more secure wristband features that prevent unauthorized individuals from slipping through.
Hospitality and staff zones
Hospitality areas and dedicated staff zones sit somewhere between public access and highly secure production environments. Sponsors, Very Important Person (VIP) ticket holders, and general venue staff often need to move fluidly between these spaces and the main event grounds. Mapping these intermediate zones ensures you categorize these specific access levels clearly for your security personnel. You can then assign specific visual identifiers that help staff distinguish a hospitality guest from a working employee at a glance.
Creating a clear colour coding system
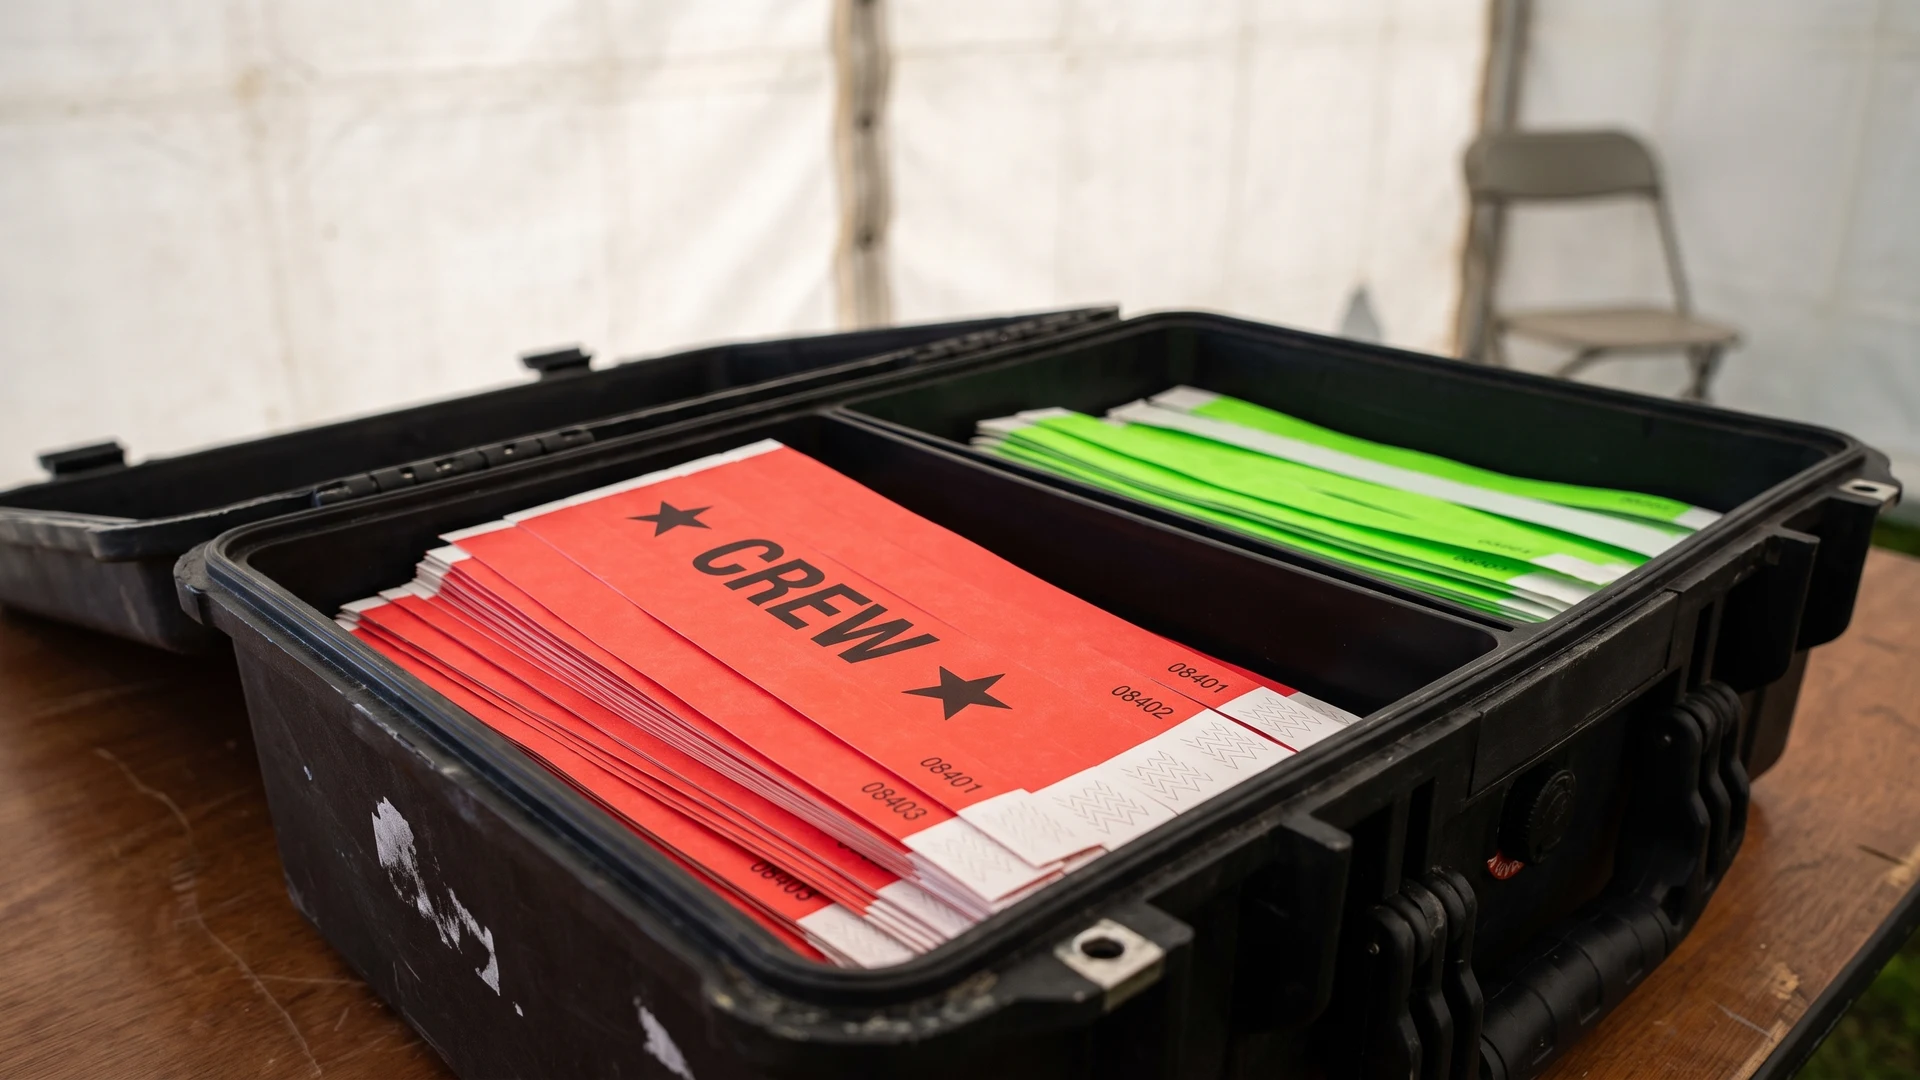
Assigning contrasting colours to different zones provides your staff with the fastest way to identify guest permissions from a distance. When a guest approaches a checkpoint, a bright colour acts as the first line of visual checking. This immediate recognition keeps crowds moving efficiently because security personnel do not need to stop every person to read small text. You can assign a green event wristband for general admission and a bright red one for backstage access to create a stark visual contrast.
While colour coding greatly improves operational efficiency, you must plan your palette carefully to avoid confusion at the gates. Using shades that look too similar under low light, such as dark blue and black, will inevitably lead to access mistakes. You should select distinct, bold colours for each primary access level to maintain clear boundaries. This simple visual strategy prepares your event for smooth crowd flow, though you must remember that colour alone is never enough for complete security.
Adding printed text and symbols for clarity
Colour coding must never be presented as your only method for communicating critical access information to your team. You must combine distinct colours with printed text labels and symbols to build a foolproof identification system. This combined approach ensures your setup functions correctly under all conditions, even if a staff member misreads a colour.
Large text labels for access levels
Printing large text directly on the event wristband eliminates any ambiguity about where a guest is allowed to go. If a staff member struggles to identify a colour due to poor lighting, a bold label provides an undeniable secondary check. You should ensure the font is large enough for security personnel to read easily from a few feet away. This dual-verification method speeds up entry while significantly reducing the chance of accidental unauthorized access.
Symbols for special permissions
Many events require guests to hold specific permissions that do not warrant an entirely different wristband colour, such as alcohol consumption approval. Adding clear symbols, like a star or a beverage icon, allows staff to verify these secondary permissions instantly. Symbols cut through language barriers and provide a quick visual cue for busy bartenders or security guards. Printing these marks prominently on the wristband face ensures the information remains visible even if the band twists on the arm.
Combining visual identifiers safely
A robust visual system relies on the intersection of colour, text, and symbols working together on a single event wristband. When you layer these elements, you create a secure identifier that is much harder for someone to replicate or manipulate. Staff can cross-reference the primary colour with the printed label and the designated symbol to confirm a guest’s exact status. This combined approach represents an objective best practice in event management, ensuring your team has all the information they need to enforce your access rules.
Using sequential numbering for access control
Sequential numbering involves printing a unique, consecutive number on every event wristband within a specific batch. This concrete operational detail supports event security without requiring complex scanning technology or expensive hardware. By assigning a distinct number to each wristband, your team can accurately track issued stock and monitor capacity in highly restricted areas. If a guest disputes their access rights or loses their wristband, staff can reference the assigned number to resolve the issue quickly.
You can also use numbering to connect a specific event wristband directly to a guest registration record or ticket purchase. When staff record the number during the issuing process, they establish a clear line of accountability that discourages guests from attempting to transfer their wristband. Knowing exactly which number sequences belong to which day or zone also helps you identify counterfeit wristbands instantly. This simple administrative step gives you a powerful tool for maintaining strict control over capacity and access permissions throughout the venue.
Choosing materials based on zone requirements
Matching the physical material of your event wristband to the specific demands of each access zone prevents serious security breaches. For short-term general admission, you might choose wristbands made from high-density polyethylene fibers, commonly known as Tyvek. These lightweight bands use an adhesive closure with die-cut security slits that tear and shred if a guest attempts to remove or transfer the band. This tamper-evident design provides a cost-effective, waterproof solution for single-day zones where simple visual access control remains the main priority.
Highly restricted areas and multi-day events require more durable materials combined with stronger locking mechanisms. Plastic or vinyl wristbands featuring a one-way plastic snap closure offer a much higher level of security for production zones. When pushed together, internal directional teeth permanently lock the snap, meaning the wristband must be physically cut to be removed. Understanding these material properties ensures you never make the mistake of using easily transferable options for sensitive areas, keeping your overall access system secure.
Training your team to check wristbands
Even the most secure event wristband system will fail if your team does not know how to inspect it properly. You must provide a concrete, sequential process for staff to follow when evaluating guests at every zone entry point. Giving your security personnel a reliable checklist minimizes access mistakes on the day. This training turns your carefully designed wristband plan into actionable, effective operational procedures.
- Check the primary colour: Instruct staff to look at the overall colour of the wristband first as the guest approaches the checkpoint. This initial visual sweep allows them to identify the correct access level quickly from a distance. It keeps the queue moving smoothly by filtering out guests who clearly belong in a different zone.
- Verify the printed text: Have your team read the large text label to confirm the specific access level matches the assigned colour. This secondary check prevents mistakes caused by poor lighting or similar shades of wristbands. Staff can confidently direct the guest based on clear, undeniable text rather than guessing.
- Look for required symbols: Train security to check for any secondary symbols that indicate special permissions alongside the main access level. This step is particularly important for identifying age verification or specific hospitality perks. Spotting these symbols early prevents staff from having to ask guests for secondary identification repeatedly.
- Inspect the physical closure: Require staff to examine the adhesive or plastic snap closure closely before allowing the guest through the checkpoint. They must look for any signs of stretching, tearing, or taped repairs that suggest the wristband was transferred. Catching a broken closure immediately stops unauthorized access and protects the integrity of your restricted areas.
- Check the sequential number: Ask staff to verify that the printed number falls within the approved sequence for that specific day or restricted zone. This final step guarantees that the wristband is authentic and originated from your official stock. Cross-referencing the number provides a definitive answer if any disputes arise regarding a guest’s permission to enter.
Maintaining control throughout the event
Integrating colour, clear text, specific symbols, and sequential numbering creates a highly cohesive visual access system for your venue. When you match these identifiers with the correct physical materials and train your staff thoroughly, managing multiple access zones becomes a straightforward process. Your tailored setup will simplify workflows at the gates and secure your restricted areas effectively from start to finish. Event Wristband Info provides practical guides and objective knowledge to help you plan these procedures confidently for your next successful event.
How should I choose wristband materials for different access zones?
Match the material to your wear time and risk. Tyvek, a synthetic high density polyethylene, is tear resistant, waterproof, and ideal for single day general admission. Vinyl or plastic with durable print suits multi day hospitality. Fabric adds comfort for crew when you use a secure closure.
What closure type best reduces wristband transfer between guests?
Use closures that show tampering and cannot reopen cleanly. Plastic snap closures have one way teeth that lock with a click and must be cut to remove, so your team spots transfer attempts. Adhesive Tyvek with security slits shreds on removal. Fabric needs a locking ring, not a slider.
How can I keep printed access details readable over a weekend?
Choose printing built for abrasion and moisture. Thermal transfer, which uses a resin ribbon, resists smudging better than direct thermal, which uses heat reactive paper. Pick synthetic stocks with a protective topcoat. Ask staff to avoid alcohol gels on the print area to preserve barcode contrast.
What is a clear way to combine colours, text, and symbols for zones?
Use colour as the first cue and print permissions as words and icons. Assign distinct colours per zone, then add large text such as Backstage or Hospitality and a simple symbol. Keep high contrast, repeat the label near the closure, and avoid relying on colour alone.
How should we use sequential numbering to manage replacements and reconciliation?
Give each zone a defined number range, record the range at handover, and log each number issued with a name or ticket reference. For replacements, ask for the damaged wristband back where possible and record the new number. After the event, compare logs to remaining stock.